Friday, October 29, 2010

Why Ikea Kitchens are GOOD

So I stumbled across a designer's blog, "Creed" the other day, and I have to say I'm impressed. And excited. Now here is a designer that can call herself a "designer". First of all, I was blown away by the space planning on one of her current projects and then I was even more blown away by her blog post on why she loves Ikea Kitchens. I've always been curious about Ikea kitchens, knowing they're affordable, but not knowing what the quality was like. I think I always assumed it was on the cheaper side like their furniture, but designer Carol Reed explains the many benefits of installing a kitchen from Ikea. Apparently, for melamine cabinets, the quality is great and one of the things I like best is that you are saving money on the cabinets so you can spend more money on materials like countertops, backsplashes, and appliances. You MUST read her post about this because it's super informative! Here are some pictures from her blog that show how you can customize Ikea Kitchen components for an unfitted and designer look.


Thursday, October 28, 2010

Dallas Digs

Just wanted to give you a heads up about an AWESOME event happening in Big D if you live there or are going to be there on November 17th.It's the 19th Annual Candlelight Walk on Henderson Ave. and it's from 6-9 pm. The Knox-Henderson area is one of my favorites to visit when I'm in Dallas because of all the great vintage shops. The Candlelight Walk is a celebration to start of the holiday season where many retailers participate in showing off their fabulous merchandise at discounted prices! Let me also mention that it offers tasty culinary treats, drinks, and music! Why wouldn't you want to go to this? One of the participants definitely worth mentioning is my friend Carrie's shop, Art is Art Consignments which sells really great vintage finds and local art. Here are just a few examples of why this store should be on your shop list:


Other participants in the Candlelight walk to include: Jones Walker Home, Gypsy Wagon, The Wooden House, Another Time & Place, La Mariposa, ART is ART, Pandemonium, Emeralds to Coconuts, Again & Again and Again Design Studio, Sputnik Modern, Form, The Pearl Cup, The Shining, We Are 1976.

Soooo... Check it out people! You will not be disappointed!

Monday, October 18, 2010

DIY Jewelry Storage

Remember my post from awhile back about jewelry storage? If not, click here. Well, I decided to try one of the more easy (and inexpensive) solutions for necklaces- the board with hooks, except that I wanted to do something a little more creative than just a plain board. I decided to make my own stencil and stencil a pattern onto the board. My inspiration was a Moroccan style design that I printed off the internet, traced onto the stencil plastic, and then transfered to the board. Here is what I did:

1. Get your board on- I bought a generic Pine 1 x 6 from Home Depot, sanded it, and painted it a creamy white. The boards are pretty long, but you can get cut there or do it at home. 

2. Stencil- Find a pattern you like from wherever. I found mine online in Google images when I searched for "Moroccan patterns". After printing, I knew that I wanted it to be a certain size for the board so I enlarged to the size I wanted on my HP copier/scanner. I then traced the pattern onto the stencil plastic which you can get at Hobby Lobby or most craft stores.

Next, cut out the pattern on the stencil plastic with an Exacto knife. This is really the hardest part of the whole process depending on the pattern you choose. Be patient as it's very tedious!


3. It's time to paint- Now you are ready to tape the stencil onto the board and paint on the design! I did a couple of pieces on one side of the stencil to keep it flat and so that I could easily remove and slide down the board. Use a small sponge or stencil brush to apply paint to open areas of stencil. Make sure you don't apply too much paint or it can seep under the plastic and mess up the design. After using the sponge, I may consider the brush next time for ease of control and texture of the paint. Be sure to let the area dry completely before removing the stencil.

4. Seal and apply hooks- I personally wanted to protect the paint from chipping and I wanted a slight sheen, so I sealed the board with Polyurthane after it was completely dry. After that was dry, I screwed in the hooks and nailed the picture hangers on the back. You are ready to go!


Not bad, huh? The finished product installed:


Friday, October 15, 2010

Warrenton Finds!

You asked for it... Things that caught my eye...
 Alabaster lamp- perfect with a black shade
 Groovy andirons
 Light fixtures made out of scrap pieces-love.
 Whimsical lanterns galore
 I was thinking this would make a great coffee table with a piece of glass added to it, but then the guy said he was going to make a pendant light fixture out of it- how great is that?!
 Love this ruffle detail on the lampshade. Note to self.
 Liked the thick welt on these cushions.
 Fabo mirror
 These chairs remind me of a 50's ice cream parlor!
 I thought these doors would be rad with new glass or not depending on your interior
 Loved the carving on this cute fireplace mantle!
 One great lamp display, although they were still out of my budget
 This could make a great headboard!
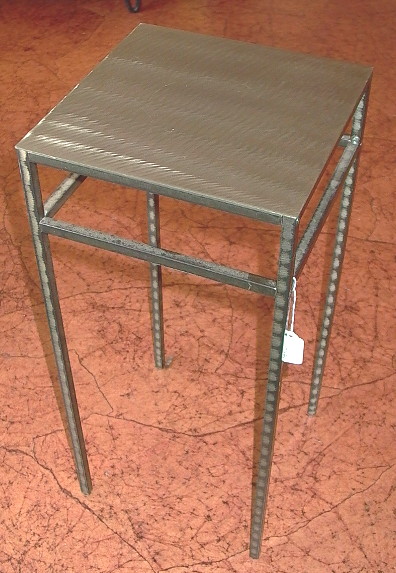
 Almost bought this as a side table but it was a little too short
 Another great headboard...
 Awesome Kilim rug, not in budget for me either :(
 SUPER duper rad ikat throw. I would love this to be a comforter on a bed.
 Some unique ironwork

 OMG I love this cabinet!
 And this table
 the Moroccan detailing
 AND LAST BUT NOT LEAST- our take homes for the day! I can't believe I only left with a small Kilim purse a few vintage bracelets and a pillow for the trailer! Can't wait to go back next year!!

Wednesday, October 13, 2010

Women on a Mission....

Here it is! I'm smiling as I write it... Our girl trip to Warrenton, TX for Antique Week!!! I can't stress enough what a blast I had with my friends Jenny and Lisa. We were women on a mission!!
This isn't ours, but isn't is fantastic?! 

Our drive into Warrenton consisted of me being a little frazzled driving the trailer because it was my first time all by myself! (Without my husband) The drive was beautiful and our campground was awesome! Lisa did such a great job finding it! After a small scare with our electricity not working and finding out that the sites didn't have a grill (our only planned form of cooking), we ended up at the Park Host spot which was covered and situated between 2 groups of awesome older ladies doing the same thing we were, and a portable grill found in the shelter area. We proceed to eat some gourmet chicken and mushrooms and cantaloupe wrapped in prociutto. I can't forget to mention the yummy cheese that tastes like BUTTA! And the chocolate loaf cake our neighbors brought over-DIVINE. Thanks again Chef Lisa! We proceeded to Warrenton the next morning to scour the fields for prizes, but you'll have to wait for the next post to see what we found...


Photos courtesy of Miss Lisa Khoung
on my new Iphone 4!

Tuesday, October 12, 2010

Double D

I really love the look of Dark Doors with white trim, don't you?